
How to Make a Homemade Bow and Arrow Easy?
"As an Amazon Associate, I earn from qualifying purchases. This post contains affiliate links"
Do you want to learn how to make Homemade Bow? It’s actually easier than you think! With the right materials, tools, and instructions, you can create your own bows and arrows in no time.
Whether it’s for hunting or target practice, making a homemade bow and arrow is an exciting experience that gives you the opportunity to explore your creative side. So let’s get started on this DIY project of building a powerful bow and arrow!
So without any issue let’s get into it!
How to Make a Homemade Bow and Arrow Easy?
At first, you might be doubting yourself and thinking about whether it is easy to learn.
![]()
But the answer is YES! With the right materials, tools, and instructions, you can create your own bows and arrows in no time.
Let’s go through this whole process from zero level so that you can understand each and every step.
Things You Will Need For Homemade Bow and Arrow
Here is a list of materials needed to make a homemade bow and arrow:
- Piece of wood for the bow (ideally about 2 feet in length)
- A spool of strong string or fishing line
- Arrow tips (for wooden or aluminum arrows; screw on broadheads for hunting)
- Fletching material for arrows (feathers, cloth vanes, etc.)
- Glue
- Waxed thread
You can find these materials at your local hardware store, sporting goods store, online vendors such as Amazon.com or eBay.com, and even some craft stores. Be sure to check with each store or vendor for the best price and selection.
How to Make a Bow?
Once you have gathered all of the necessary material you are ready to start the process without any issue whatsoever.
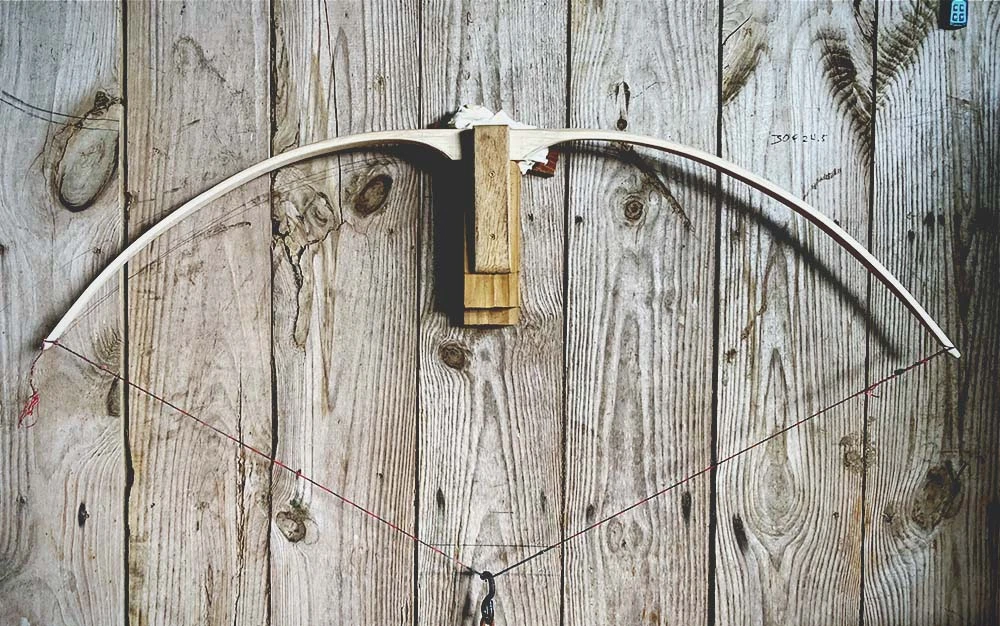
Step 1: Select the Right Wood for the Bow
Select a piece of wood that is about two feet in length and about 1 to 2 inches thick. Hardwoods such as oak, maple, ash, hickory, walnut, and cedar are ideal for making bows.
You should always avoid softwood such as pine or fir as these will not be strong enough for the job. Apart from that, another main reason why you should always use hardwood is that it is easier to carve.
Step 2: Cut and Carve the Bow
Use a sharp knife or saw to cut your piece of wood into the shape you would like for your bow. Be sure not to make it too weak or flexible, as this will reduce its strength and accuracy when shooting. You can also use specialized tools such as bow press jigs to help with carving your bow correctly.
Step 3: Cut the Notches for Your Bowstring
Using a saw or coping saw, cut notches into both ends of the bow where you will tie on your bow string. Make sure to make these notches deep enough so that your string doesn’t slip off easily when you draw it back to fire your arrows.
Step 4: Tie On Your String
Once you have cut the notches, you can start to tie on your string. Start by taking a length of waxed thread and tying it onto one end of the bow. Wrap it around the notch, then bring it back up and through itself to create a secure knot. Repeat this process at the other end of the bow until both notches are tied with your string.
How To Make an Arrow?
![]()
After learning how to make a bow your next target will be making ammo for your newly created bow. In this section we will learn how to make arrows. So let’s take a look at things and see how it is done professionally.
Step 1: Choose the materials for the arrow
Different types of materials and their properties can be used to make arrows. For example, wooden arrows require tips made of metal or hardwood; aluminum arrows require screw-on broadheads for hunting.
Fiberglass arrows can use either type of tip depending on the arrow’s purpose. You should keep in mind that every single one of them has its own set of pros and cons, so choose wisely!
Here are some tips that can help you to choose the best material for your arrows.
Wooden Arrows: Wooden arrows are light and easy to craft, but they lack in strength compared to metal or fiberglass arrows.
Aluminum Arrows: Aluminum arrows are much more durable than wooden ones, and they can be used for hunting if fitted with screw-on broadheads.
Fiberglass Arrows: Fiberglass arrows have both durability and distance accuracy; however, it can be hard to find tips that fit correctly on them.
Step 2: Cut and shape the materials
The next thing that you will need to do is to cut your materials into the correct length and shape. For instance, wooden arrows should be around 30 inches in length; aluminum arrows should be 27-29 inches long; and fiberglass arrows should measure 28-30 inches long for best results.
Once you have the materials cut to the proper length, you will need to shape them correctly by using a drawknife or rasp. Make sure that each side of the arrow shaft is symmetrical and that all edges are smooth so there aren’t any snags when it comes time to fletch your arrow or attach a tip.
Tools needed for cutting and shaping the materials:
- Drawknife or rasp
- Sandpaper
- Clamps
- Marker
- Safety glasses
Follow these tips on getting the right shape and size for your arrow:
- Make sure to measure twice and cut once.
- Use the right tools for the job.
- Be aware of any potential safety hazards while working with sharp tools.
- Have a plan in place before you start cutting or shaping your materials.
Step 3: Assemble the arrow
The final step to make arrows for your bow is that you need to assemble the arrow. This includes adding fletching, nocks, and tips as needed.
Fletching: Fletching are feathers or vanes that attach to the rear of the arrow shaft to provide stability in flight. They come in a variety of shapes and sizes, and you should choose based on your purposes for shooting (target practice or hunting).
Nocks: Nocks are small plastic pieces that fit onto the back end of an arrow shaft and provide a resting place for your bow string when firing arrows from a recurve or compound bow.
Tips: Tips can be made from either metal or hardwood depending on the kind of material used for the arrow shaft. For example, wooden arrows will require metal tips and aluminum arrows will require screw-on broadheads for hunting.
Tools needed to assemble the arrow:
- Fletchings or vanes
- Nocks
- Tips (broadhead or metal)
- Glue
Follow these tips on assembling your arrow correctly:
- Make sure that all pieces are securely attached and in position before firing.
- Double-check that everything is properly tightened and secure.
- Apply a generous amount of glue when attaching any parts to ensure a secure bond.
- Use protective gloves while handling materials and tools, as they can be sharp.
Now you know how to make an arrow! With these steps and tips, you can now create your own arrows to use in bow hunting or target practice. Be sure to take the necessary safety precautions while making them and always follow instructions when using tools and materials.
Bonus tip: Once you have finished creating your arrows, waxing them can help keep them in good condition for longer periods of time. Use a hot paraffin wax (available at most sporting goods stores) and rub it onto the shafts with a soft cloth or brush. This will add an extra layer of protection against moisture and corrosion, preserving the integrity of your arrows for years to come.
Tips and Tricks For Successful Bow and Arrow Making
![]()
Making a strong, accurate bow and arrow can be a challenging task if you are not familiar with the correct methods. Here are some tips and tricks to ensure your successful bow and arrow making:
1. Choose the right materials
When making a bow and arrow, it’s important to select the right type of wood, such as maple, yew or black locust, in addition to other materials like animal skin for the bowstring.
Other commonly used materials include bamboo, horn, fiberglass and carbon fiber for arrows. Make sure you select the best material for your purpose – this will determine the quality of your finished product.
2. Take time to shape the wood correctly
The size and shape of your wood should be determined according to its purpose; for instance, lighter woods should be used when making arrows that need to fly further; heavier woods should be used for short-distance shots which require more power behind them.
Pay close attention when shaping the wood; it is important that both ends have the same radius so that they are balanced when shot from your bowstring.
3. Inspect All Parts Thoroughly Before Putting Them Together:
Before assembling any part of your bow or arrow, take time to inspect each piece carefully – even minor defects can affect how well your setup works in practice and may cause safety issues too.
Also make sure not to skip any steps when putting together individual components – mistakes during assembly may also impair accuracy or ruin the final result altogether!
4. Use Natural Glue Instead Of Synthetic Ones Whenever Possible
Natural glues like hide glue or pine resin help keep moisture out while improving performance – they also provide better adhesion than commercially available synthetic glues which tend to produce weak bonds that quickly degrade over time with exposure to humidity or temperature changes.
5. Test Out Different Combinations
Until you get an ideal setup for yourself Your finished product should fit you like a glove; test different combinations of bows, strings, weights, and other components until you find what works best for you personally.
This will give you an advantage over people who just get whatever’s on sale at their local store! Focus on what feels most comfortable for yourself; sometimes even small adjustments can make a huge difference in terms of performance!
Last Minute Thoughts!
Well, this is definitely possible and you don’t even need fancy tools for making bows and arrows. Even with a little bit of skill and the right direction, you can make a powerful hunting crossbow.
Making your own arrows is also fairly simple. All you need are some basic tools and materials, plus a bit of creative thinking. The most important thing is to make sure the arrows are balanced correctly – this will ensure they fly straight and true when released from the bowstring.
Finally, don’t forget that practice makes perfect! After making your first set of bows and arrows, keep at it until you master the craft! With enough patience and dedication, you’ll soon be able to create professional-looking bows and arrows with ease.
Good luck!
Related Articles:-
- Is It Illegal to Shoot a Bow and Arrow in Your Backyard?
- How To Calculate Arrow Weight?
- Jake Kaminski Archery
- Butch Johnson Archery
- Dave Cousins Archery
- What Should You Do When Operating a Crossbow?
- How Fast Does An Arrow Travel From A Crossbow In Miles?
- How to Determine Arrow Length for Recurve Bow?
- How Many Arrows In A Quiver?
- How to Wear a Hip Quiver?
![Are Old Compound Bows Worth Anything? – [Explained]](https://archerypick.com/wp-content/uploads/2022/10/2-Are-Old-Compound-Bows-Worth-Anything-768x436.webp)
![Best Hunting Arrows For Compound Bow – [Our Top Picks]](https://archerypick.com/wp-content/uploads/2023/09/Best-Hunting-Arrows-For-Compound-Bow-768x436.webp)
