
How to Aim a Recurve Bow Without a Sight? – [5 Steps To Follow]
"As an Amazon Associate, I earn from qualifying purchases. This post contains affiliate links"
Do you want to learn how to shoot arrows with precision and accuracy? If so, then learning how to aim a recurve bow without a sight is essential. Archery is an ancient art that has been used for centuries as both a recreational activity and hunting tool.
Though it can take some practice, aiming your recurve bow without the aid of a sight is relatively simple once you understand the fundamentals of shooting form and technique. In this article we will break down this whole process into simple small steps and will help you learn how to do it the right way.
So without any further ado, let’s get started!
How to Aim a Recurve Bow Without a Sight?
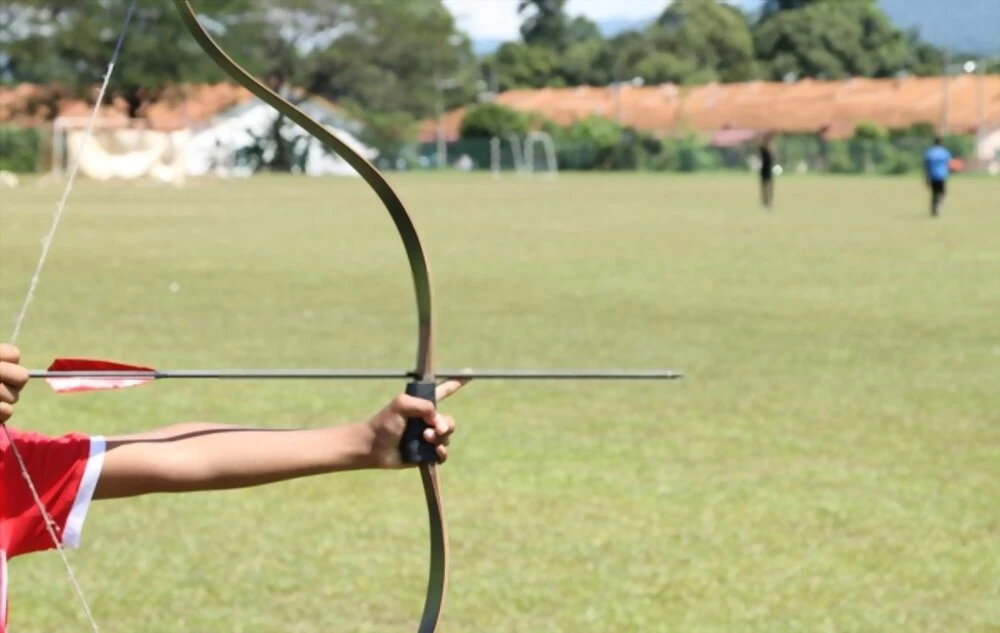
Recurve bows are a popular choice for archers because of their flexibility, speed, and accuracy. To get started without a sight, you need to first make sure that your bow is correctly set up before you try aiming it.

The following steps will help you nail it squarely with proper knowledge and practice. Once you have followed all the instructions given below you will be able to not only aim your recurve bow but you will enjoy every single shot you line with it.
Step 1: Understanding The Principles Of Aiming A Recurve Bow
When it comes to learning how to aim and shoot with a recurve bow without sights the first thing that you need to know is to understand the principles of aiming a recurve bow.
You Might Also like to Read Our Last Article: How to Determine Arrow Length for Recurve Bow?
The most important thing to remember here is that you should always focus on maintaining proper form and technique while shooting. This means keeping your bow arm straight and your back arched in order to keep the bowstring taut and aligned with the target.
The second part of aiming a recurve bow without sights involves understanding the role of the various components such as the bowstring, nocking points, and anchor points.
As you draw your string back towards you, it is important that both nocking points are correctly positioned in relation to each other so that when the arrow is knocked it will travel straight towards the target.
Additionally, your anchor point should also be positioned correctly on your face so that when you release the arrow it will fly true in a straight line.
Finally, it is important to practice aligning all these components before you take an actual shot as this will help ensure that your aim is accurately lined up with the target.
This can be done by first lining up your bow arm, back, and bowstring then checking the position of both nocking points, and finally adjusting your anchor point until everything is properly aligned.
Once you have mastered this technique, you should be able to aim and shoot a recurve bow without sights effectively and accurately!
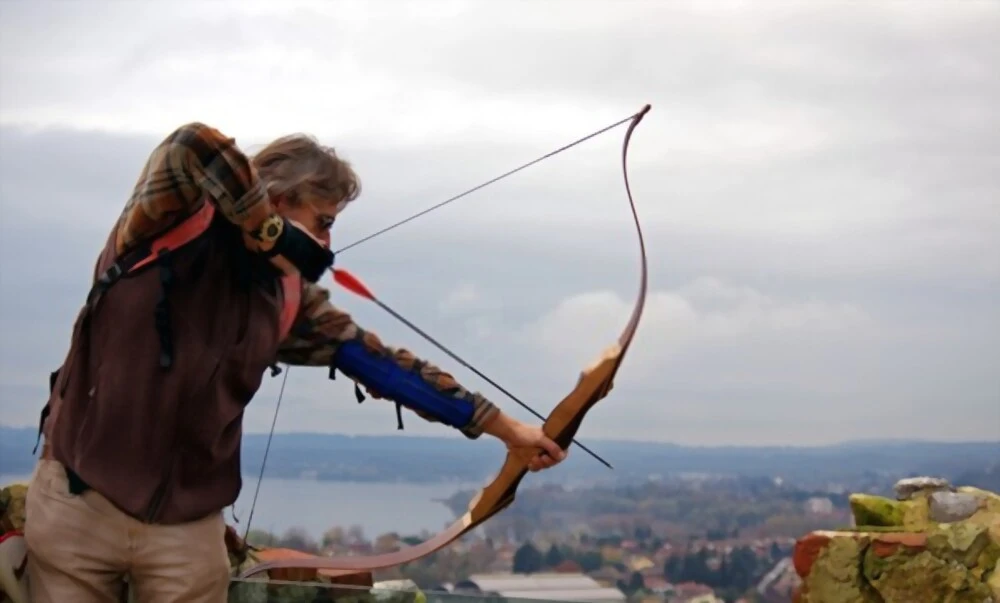
Step 2: Establishing A Consistent And Reliable Anchor Point
First of all, you need to find out the right anchor point for your body and bow. This anchor point is the spot on your face where you will place your index or middle finger when drawing and releasing the bowstring.
For most people, the ideal anchor point is just below their chin but this can vary depending on a person’s size and shape. It is important to experiment with different positions until you find one that works best for you.
Once you have found the right anchor point, it is essential to ensure consistency in its placement each time you draw your bowstring back. Consistency ensures accuracy and leads to more successful shots so it should not be overlooked.
Step 3: Aligning The Bowstring With Your Target
The next thing you need to do is to perfectly align the bowstring to your target. This will require you to use your dominant eye and focus on the target while drawing back the string.
One way to do this is to use your peripheral vision and visualize the path of the arrow as if it were already released. It may also help to keep a visual reference point, such as an object in line with where you want the arrow to go, in order to maintain proper alignment.
Additionally, it is important that you place your fingers properly on the bowstring when drawing and releasing it. This will ensure that the bowstring is taut and properly aligned for each shot.
Step 4: Adjusting For Wind Conditions
Finally, when shooting outdoors, you need to adjust for wind conditions in order to hit your target. Depending on the direction and strength of the wind, you may need to adjust your aim accordingly in order to compensate for it.
This can be done by simply tilting the bow slightly in the opposite direction of the wind or adjusting your anchor point until you achieve your desired result.
It is important to practice this as much as possible so that you become more familiar with how to make these adjustments quickly and accurately during actual shooting sessions.
Step 5: Practicing And Refining Your Aim
Once you have learned the basics the next thing you need to do is to grind and master your technique. Regular practice is essential to becoming a better archer and continuously refining your aim.
A bow square can be used to help check your form regularly, as well as provide feedback on what needs to be worked on. You should also aim to shoot at different distances in order to build accuracy and confidence with long shots.
Finally, it’s important to take the time for dry firing (shooting without arrows) so that you can focus on perfecting each shot without worrying about hitting the target.
With dedication and practice, you will soon become an expert at shooting a recurve bow accurately!
What Is The Instinctive Aiming Method?
The instinctive aiming method is a shooting technique used by archers which relies on muscle memory and practice to achieve accuracy without relying on sights or other aids.
It involves training your body and mind to instinctively line up the bowstring with the target while drawing the string back, rather than relying on sight. This method allows for more rapid shooting and can be especially useful in hunting scenarios where accuracy is key.
To master this technique, it is important to practice regularly and focus on building consistency, alignment, and balance between shots. Additionally, adjusting for wind conditions as well as working on refining your aim will also help you become an expert at instinctive aiming.
Once mastered, instinctive aiming can allow you to shoot accurately even at long distances, making it an invaluable skill for any archer.
Instinctive Archery Training Exercises
To become an accomplished instinctive archer, it is important to practice regularly and refine your shooting technique. Here are a few exercises that can help you improve your abilities:
- Practicing dry firing (shooting without arrows) on a bow square or other target – this helps build muscle memory and consistency with each shot.
- Shooting at different distances – varying the distance of your shots will not only increase accuracy but also familiarity with long-distance shots.
- Adjusting for wind conditions – learning how to make quick adjustments based on the direction and strength of the wind is essential for outdoor shooting.
- Practicing visualization techniques – visualizing where you want the arrow to go before releasing it can help with accuracy.
These exercises will help you develop your shooting skills and become an expert at instinctive aiming with a recurve bow.
What Is A Common Bow Shooting Error?
One of the most common bow shooting errors is called torquing, which occurs when an archer twists their body or arm while drawing the bowstring back. This can cause the arrow to veer off course and result in a miss.
In order to avoid this error, it is important to practice proper form and technique regularly. Developing muscle memory with regular dry firing sessions can help maintain consistent form throughout each shot.
Additionally, be sure to keep your posture straight and your arms parallel as you draw the string back, as any deviation from this will make it more likely that you will torque when shooting.
By following these tips and focusing on developing proper form, you can reduce your chances of making this common shooting error.
What Is The Best Way To Practice Aiming?
The best way to practice aiming is by focusing on good form, consistency, and repetition. To build proper form, use a bow square or other target to check that you are maintaining consistent alignment between shots.
This can help you ensure your posture and arm position remain steady throughout each shot. Additionally, focus on repetitively shooting at different distances so that you become more familiar with long-distance shots.
Finally, taking the time for visualization before releasing the arrow can also be beneficial in helping refine your aim. With enough practice, these techniques will help you improve your accuracy while shooting a recurve bow.
How Many Hours A Day Do Archers Train?
The amount of time an archer spends training will vary depending on their goals and commitment level. For novice archers, it is often recommended to start with just one or two hours a day, gradually increasing the duration as they become more experienced.
For more competitive or professional archers, the amount of time spent practicing can range from four to eight hours a day. This typically involves a combination of dry firing, shooting at targets, adjusting for wind conditions and other environmental factors, as well as visualization exercises.
The key is to find the right balance between practice and rest in order to maximize performance.
Regardless of your skill level, regular practice and dedication are essential for becoming an expert at instinctive aiming with a recurve bow.
Last Minute Thoughts!
So How to Aim a Recurve Bow Without a Sight?
We have already given a detailed answer to this question. The best way to learn how to aim a recurve bow without a sight is to practice proper form, consistency, and repetition. That means practicing dry firing on a bow square or other target, shooting at different distances, adjusting for wind conditions and visualizing the shot before releasing it.
Additionally, make sure you are aware of common shooting errors such as torqueing in order to avoid making mistakes that can affect your accuracy.
Lastly, remember that the amount of time spent training will vary depending on experience level and commitment – so find the right balance between practice and rest for maximum success! Good luck!
Happy Shooting!
Related Articles:-
![How to Wear a Hip Quiver? – [Simple Steps Guide]](https://archerypick.com/wp-content/uploads/2022/12/2How-To-Wear-A-Hip-Quiver-1-768x436.webp)

![What Is A Nock In Archery? – [Things You Need to Know!]](https://archerypick.com/wp-content/uploads/2022/10/2-What-Is-A-Nock-In-Archery-768x436.webp)
